The Right Way to Vacuum-Seal Fish
Learn how to vacuum-seal fish the right way to extend the life of your fillets for several more months.

Many of us rely on the contents of our freezer to nourish us through the long, cold, winter. Distant memories from victorious fishing trips sealed up in air-tight bags provide inspiration for the days ahead. Follow these few steps to learn how to vacuum seal fish and freshen up your frozen fish dinners.
[Looking for a new seafood recipe? Check out our cooking section!]
(Note: On The Water is reader-supported. When you buy through links on our site, we may earn an affiliate commission.)
Brine It
Giving your fillets a quick brine before going into the freezer can make a big difference.
Dissolve 1/4-cup of salt in 2-pints of cold water, and soak your fillets for above five minutes.
The salt will penetrate the cells on the outside of the fillets, which will prevent water from entering them, which causes crystallization of the flesh during the freezing process. Brining will give the fish a firmer texture and minimize moisture loss.
Dry It
Make sure the fish is completely dry before the freeze. Wrap each fillet in a layer of paper towels, and gently press on them until they’re thoroughly dry.
Excess moisture on fillets can cause several problems when vacuum-sealing. First, if water gets sucked out of the bag in the vacuum process, it can compromise the heat seal. Excess moisture will also increase the likelihood of the fillets developing freezer burn.
Don’t Squish the Fish
When you place a fillet in a vacuum, moisture is squeezed out of it. For this reason, I like to flash freeze fish before I vacuum seal it.
Wrap each fillet in plastic wrap, and freeze for about 3-to-4 hours until it starts to harden up.
Remove the plastic wrap, and then vacuum-seal it. Doing this will ensure no moisture is sucked out of the fish by the vacuum.
The Proper Thaw
Properly thawing your frozen fish is a crucial step many people overlook. For the same reason I mentioned above, you don’t want to squeeze your precious fish in a vacuum. The trick is to cut a hole in the freezer bag right after you take it out of the freezer, which will release the seal, and allow your dinner to thaw out while not under pressure.
It is also a good protocol to thaw fish, or any meat, as slowly as possible. When frozen fish is defrosted in the fridge, or in cold water, some of the excess moisture is slowly reabsorbed by the muscle fibers. With quick thaw methods, the meat is more likely to lose moisture, making it taste a bit drier and tougher after it’s cooked. The problem with refrigerator thawing is that it is painfully slow. So plan accordingly.
Spice It Up
I find that after 3-to-4 months, frozen fish starts to develop a “fishy” smell and taste. Fatty fish like tuna and salmon has an even shorter freezer life; I try to eat it within 2 months. Lean, white fish like haddock, tautog, and black sea bass fair better in the freezer.
When cooking frozen fish that’s at the end of its shelf life, it’s wise to opt for a recipe that’s spicy, or has bold seasonings. This is an old trick that’s used in many restaurants to mask fish that has passed its prime.
[Submit photos using the hashtag #LivingOffTheLandAndSea, or email them to feedback@onthewater.com]
External Suction vs Chamber Vacuum-Sealers
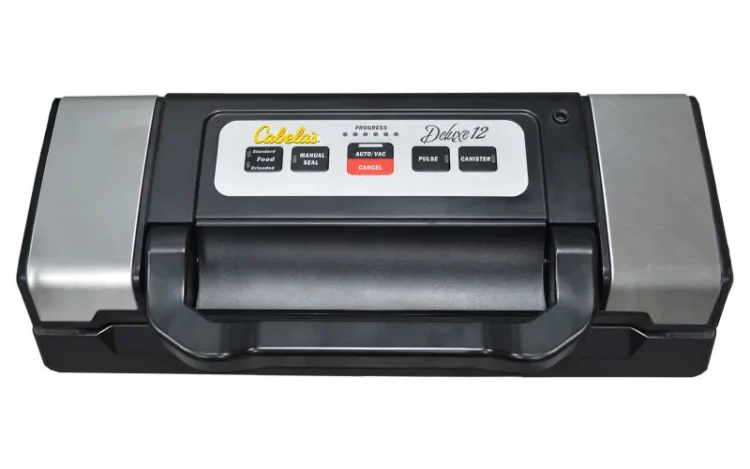
There are two types of vacuum-sealers: External Suction Sealers (FoodSaver style) and Chamber Vacuum-Sealers.


External Suction Sealers are by far the most popular. They don’t take up a lot of space on the counter, they’re affordable, and they do a decent job at preserving meat and fish. The downside is the specialty bags they require are expensive, averaging about 50-cents per bag.
With Chamber Vacuum-Sealers, food is placed in a bag, and then the entire bag is placed inside the vacuum chamber with the open end laying over a sealing bar. The chamber is closed, and a powerful motor draws a vacuum on the entire chamber. When ready, the bag is sealed, and the vacuum is released. These units typically require a large initial investment and take up more space on your counter. But they have several advantages.

- When using a Chamber Vacuum-Sealer, the vacuum on the inside of the bag remains the same as the vacuum on the outside of the bag. This means you can vacuum-seal soups, sauces, stews, or anything with liquids.
- Chamber Vacuum-Sealers use a much larger selection of available bags, which only cost about 10-cents per bag.
- Depending on the model and size, some Chamber Vacuum-Sealers can seal multiple bags in a cycle, which speeds up production in a busy kitchen.
Related Content
3 on “The Right Way to Vacuum-Seal Fish”
-
GORDON FLETCHER All good advice. Kosher non iodized salt is what I use
-
Jean-Paul Maurice What if I want to vacuum pack fresh fish in order to keep it in the fridge, not to freeze it? How long a shelf life may I expect? What are the microorganisms at stake here?
-
Jean-Paul Maurice I want to vacuum pack fresh fish in order to keep it in the fridge, not to freeze it? How long a shelf life may I expect? What are the microorganisms at stake here?
Leave a Reply